By Martin Herbert
Why wooden booms?
For the first eight years of my IOM building and sailing I used aluminum arrow shafts for my booms. As I almost always sail in salt water there was a problem with corrosion and also the arrow shafts tended to flex. With the rise in carbon arrow shafts the aluminum ones started to be harder to get so it was time for a change. Could I build a wooden boom that was strong enough to stand up to hard sailing and light enough to be competitive?

I started by getting a nice cedar board with straight grain, an off cut in my shop as it happened. I cut the board to 19mm then ripped off 2mm strips, (This gave me enough wood for 12 booms). I then cut some 4x4mm square stock and with these constructed a box beam 19x8mm. Rounding the corners after assembly brought the diagonal measurement of the box in at 20mm, the class limit. This section yielded an incredibly stiff boom that weighed in at 19.4 grams for an A rig jib boom. My arrow shaft boom was lighter by about five grams but was not stiff enough. An A rig jib boom in French mast section is 20 grams without fittings so I felt I was in an acceptable range.
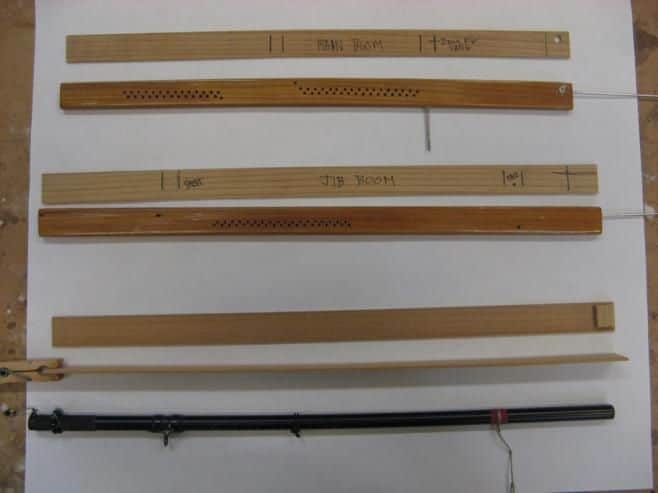
What I learned about strength: Cedar is an incredible wood but it does have its weak points, it crushes easily so the areas where fittings come into play need to be considered. In the next photo you see my patterns above each boom. The vertical pencil lines denote where spacer blocks go. These are mostly cedar but where the vang fitting enters the boom the block is Douglas fir. My gooseneck fitting is a 1/16 SS wire and it crushed its way through the cedar in no time. I used an aluminum knitting needle, cut to 8mm lengths with a flat spot filled in the middle 4mm and glued it into a hole drilled in the boom. The gooseneck stops at the flat spot and migration ends.The SS wire in the photo’s show where the gooseneck, vang, and jib counterweight are on the booms. The third row shows boom stock with spacer. The bottom is the retired arrow shaft boom. The multiple holes in the boom are for sheeting and vang adjustments. (The bends in the booms are totally a result of my inexpert photography skills). Two years in and I am very happy with the booms.
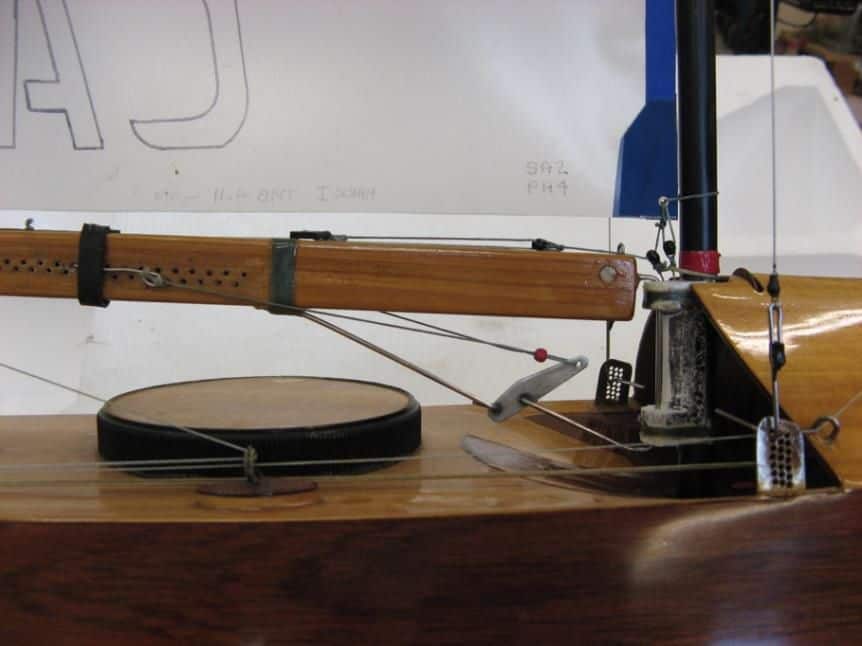
This shot shows the gooseneck/boom vang fitting made from bent 1/16 ss welding rod that runs through a plastic fitting lashed to the mast. Another rod goes into the boom, is lashed in place and the tensioning is done through the lever. Adjustment holes in the boom with a ss hook. The keeper is inner-tube sewn together at the top. On my aluminum booms I used o-rings but found they wore out, these seem easier to use and last forever. Also seen in the picture is the downhaul with an eye to keep the pressure on centreline and a bowsie to adjust tension.
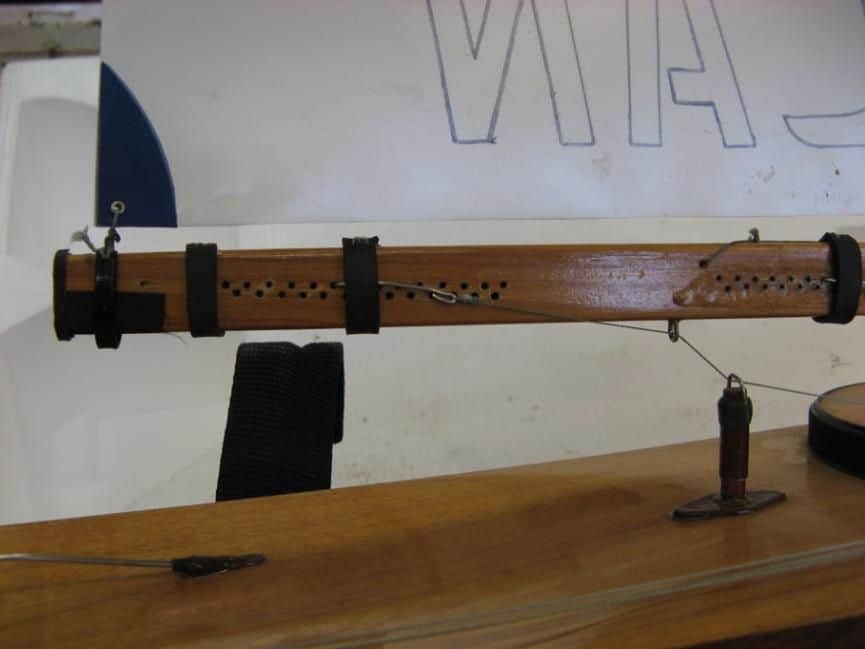
This picture shows the main sheet eye in the boom and sheeting adjustments. The tack dead ends to a piece of zip tie with a hole at each end. I lash them together around the boom and with the excess line tie it to the sail. The horizontal black on the end of the boom is sail number material put on to increase friction which is set so that the sail stays where you put it but is instantly adjustable. All my adjustments are on the starboard side of the boat. This is so that I can lift the boat out with my right hand, grab the keel with my left and make tuning adjustments with my right without having to put the boat down.
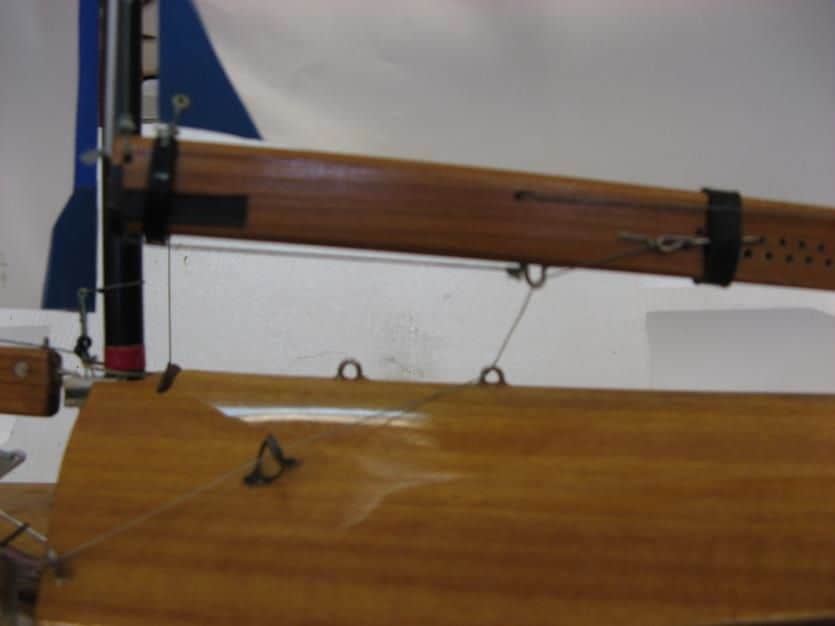
This is the aft area of the jib boom, same clue attachment as the main
The leech tension line comes to a glass bead tied to the hole in the boom and is operated with a bowsie. The white elastic behind that goes into the boom and is tied to the line emerging from the hole just above the sheet eye. The extra jib sheet eye on the deck serves to keep the sheet from flapping near the mast gate while stalling on the start line and also keeps the jib sheet off the deck when it is raining and the winds are light.
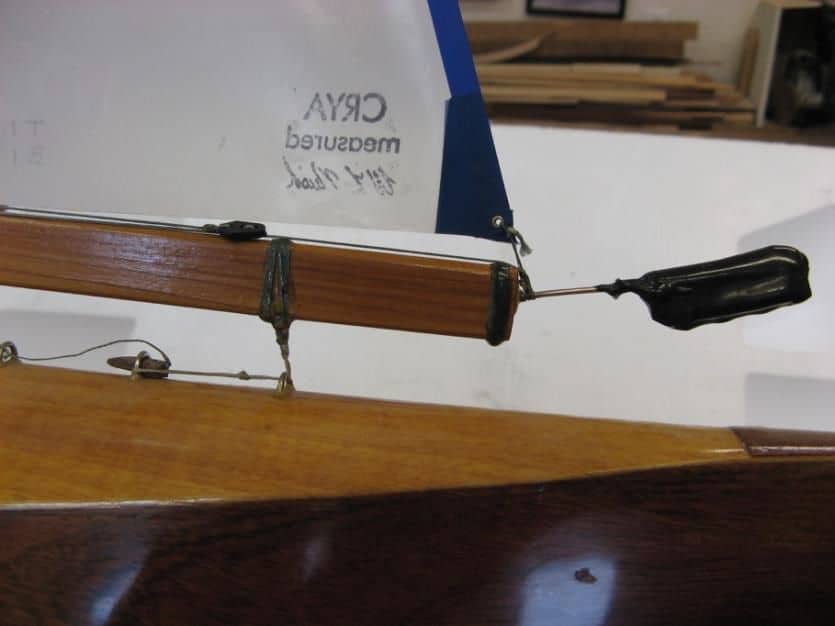
This shot
shows the boom to boat attachment, the bowsie to tension the leech elastic, the counterweight on a 1/16 rod which also serves as forestay and jib luff